During my desktop design workshops with Worksite/Interwoven/iManage clients I invariably hear one of the following:
“We have to manually add Filesite in Outlook each time we set up a new user profile.”
“We wrote a script that uses addiman to put Filesite in the Outlook tree the first time a user logs in.”
Both of these methods can work, but there’s a better way. We modify the default Outlook behavior to automatically add Filesite the first time anyone launches Outlook—no manual effort or scripting required. The detailed steps are below for Outlook 2013, but the same method works great for earlier versions too. Unfortunately, this method does not work with Outlook 2016, so the scripting method appears to be the only real option going forward.
NOTE: Steps 1-6 will generate a customized .PRF file from scratch, which adds Filesite to Outlook when it launches. If your organization already has an .MSP file and you simply want to automate the Filesite step as quickly as possible, download this pre-customized .PRF file and skip right to step #7.
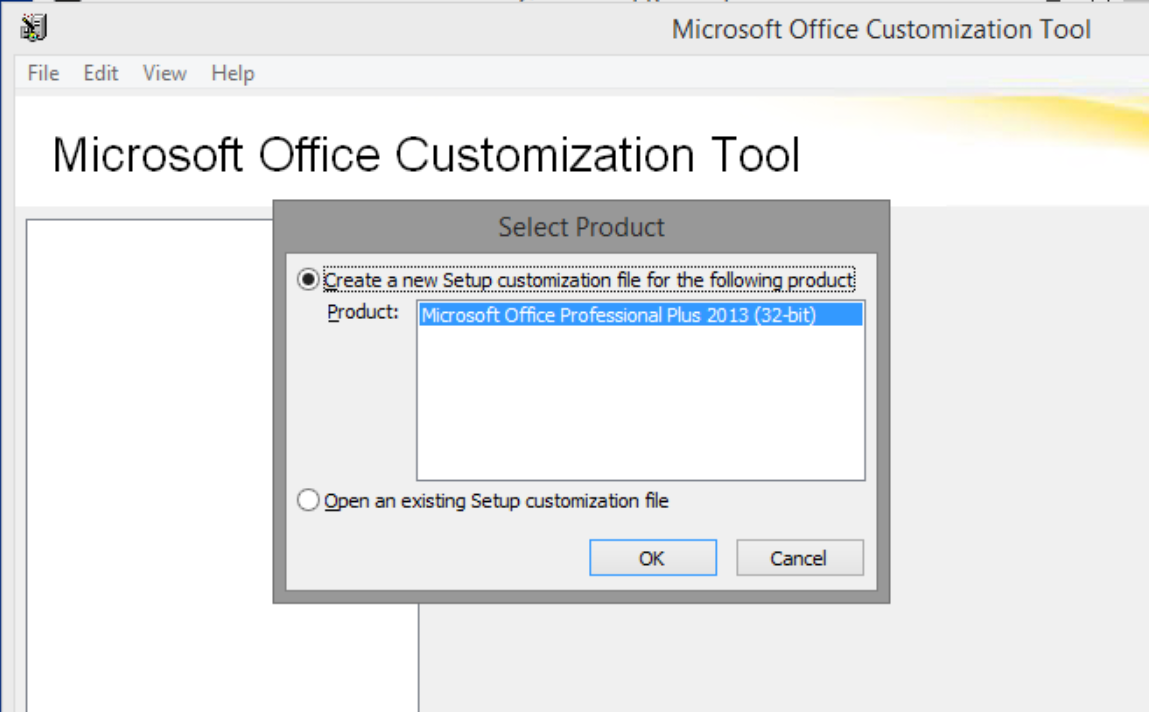
- Launch the Office Customization Tool by running “Setup.exe /admin” from the Office installation source files.
- Create a new setup customization file.

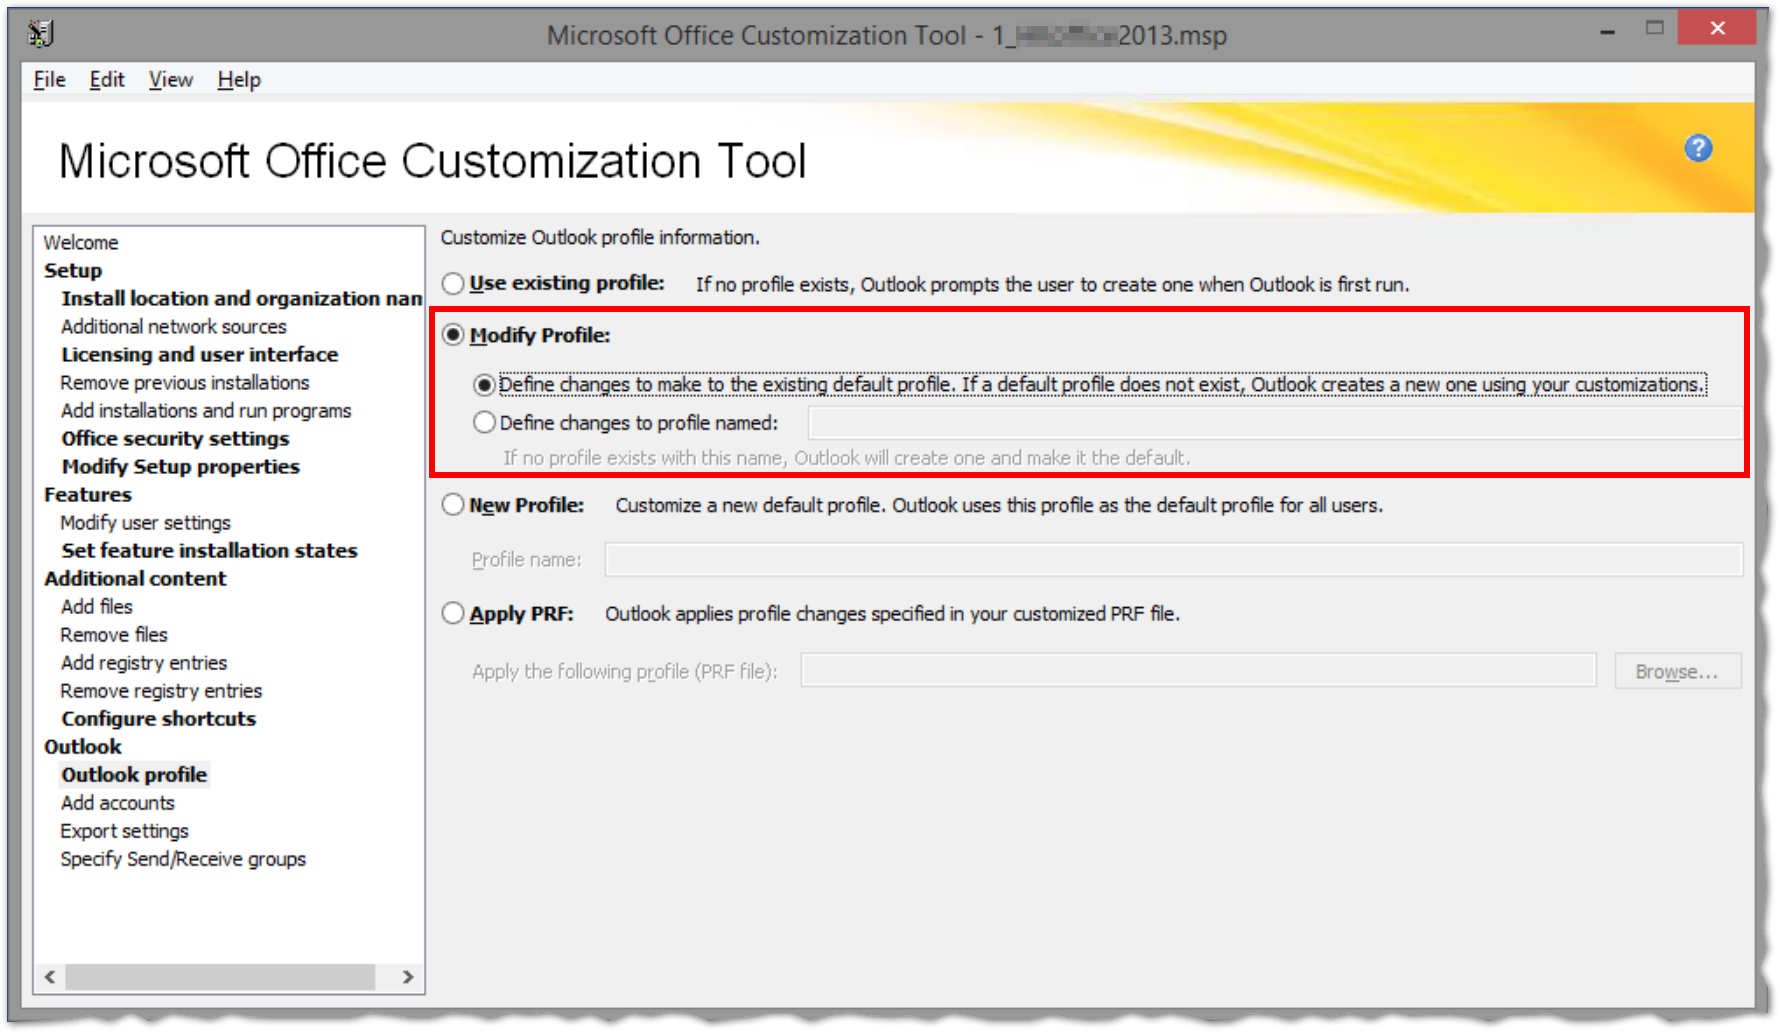
Creating a new Office customization file - Choose your desired behavior when Outlook launches for the first time. To keep the out-of-box Outlook behavior choose “Modify Profile” and “Define changes to make to the existing default profile…” (see screenshot).

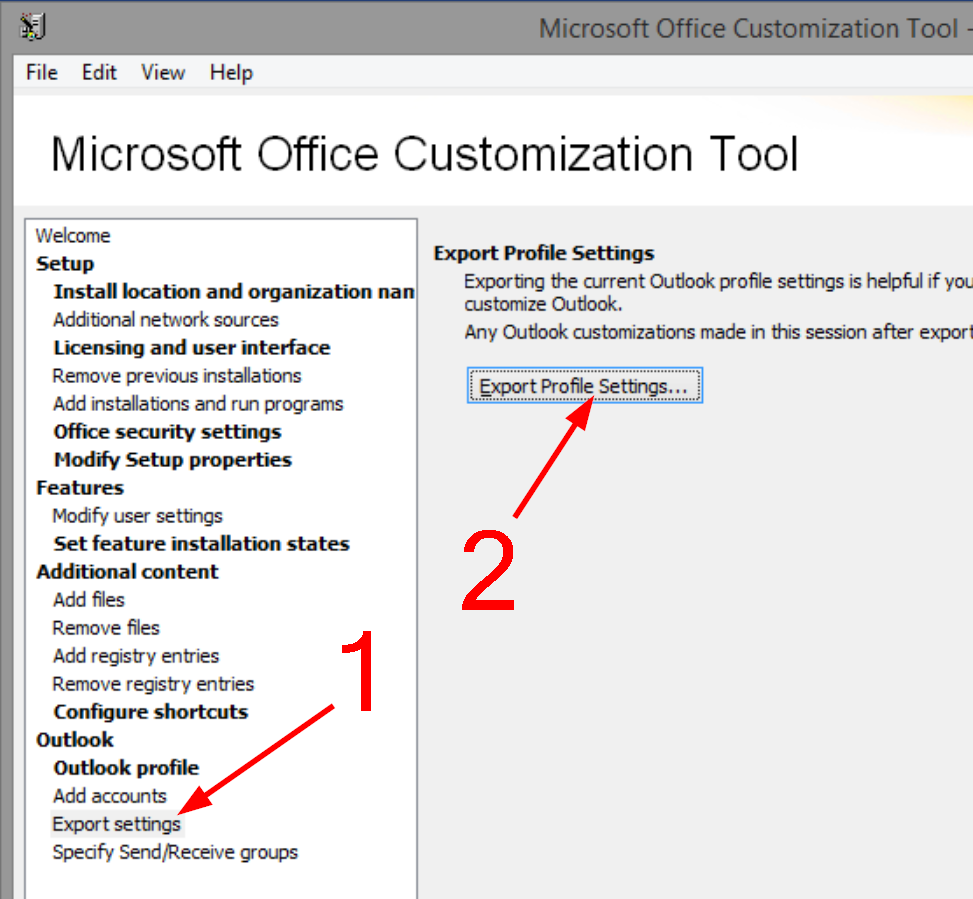
Configuring the Outlook MAPI profile setup - Export your default PRF file by choosing “Export settings” and then “Export Profile Settings…”

Exporting the .PRF file - Save the .PRF file locally and open it with a text editor. Modify your file to match the items in BOLD below using the example below.
;Automatically generated PRF file from the Microsoft Office Customization and Installation Wizard; **************************************************************
; Section 1 – Profile Defaults
; **************************************************************[General]
Custom=1
DefaultProfile=Yes
OverwriteProfile=Append
ModifyDefaultProfileIfPresent=true
BackupProfile=False; **************************************************************
; Section 2 – Services in Profile
; **************************************************************[Service List]
;ServiceX=Microsoft Outlook Client
ServiceEGS1=Exchange Global Section
Service1=Microsoft Exchange Server
Service2=FileSite;***************************************************************
; Section 3 – List of internet accounts
;***************************************************************
.
.
.; ************************************************************************
; Section 7 – Mapping for internet account properties. DO NOT MODIFY.
; ************************************************************************[I_Mail]
.
.
.[IMAP_I_Mail]
.
.
.
Connection Type=PT_LONG,0x000F
ConnectOID=PT_UNICODE,0x0010
[FileSite]
ServiceName=NRTMS - Save your modified .PRF file to a universally accessible network location.
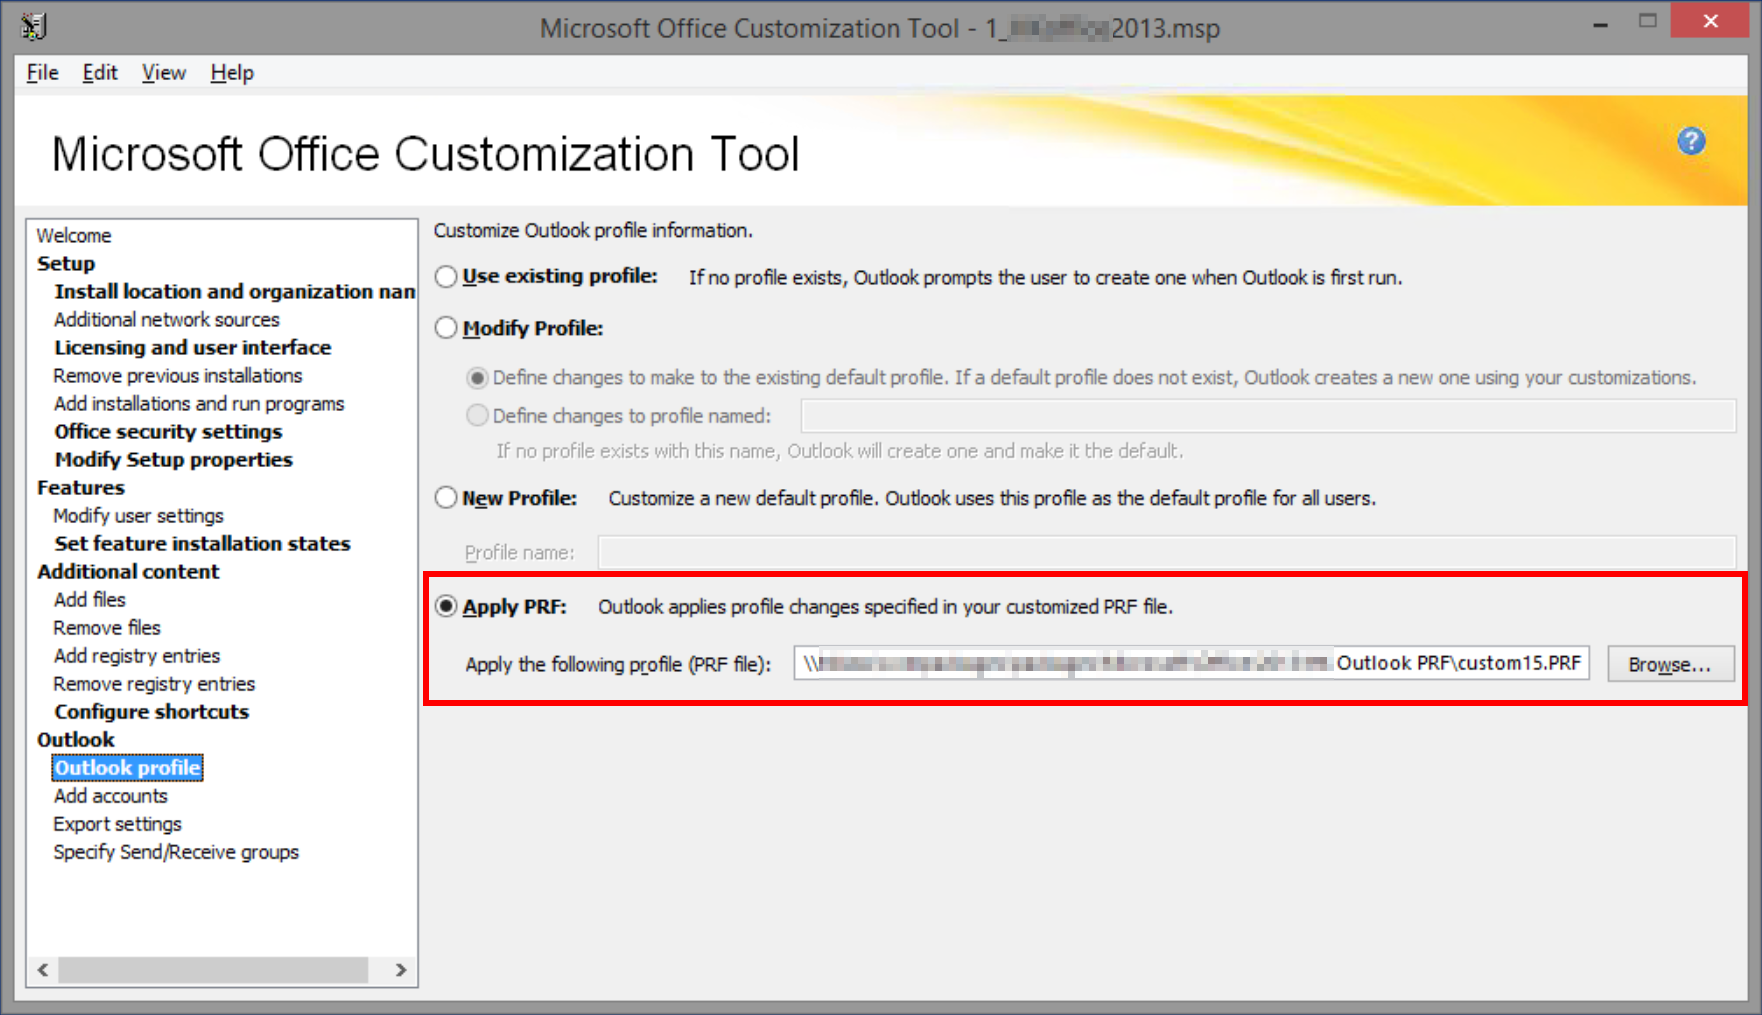
- Now that we have customized the behavior of Outlook we need to include this.PRF file in the organization’s customization answer file. Go back to the Office Customization Tool window. Choose “Apply PRF” in the Outlook Profile section. Browse to the network location where you saved the PRF file.

Applying the .PRF file - Last but not least, save your Office customization file to the Updates folder of your Office installation files. File menu –> Save As –> Choose the location for your Office installation.
NOTE: It’s important to name your customization file to be alphabetically first in this folder, so that the Outlook installation automatically finds it during the install. Usually I put “1_” at the beginning to make sure it’s first.
These customizations will now automatically happen for new installations of Office and Outlook. If you have existing Outlook installations that you would like to modify you will need to copy the .PRF file from your network location the following location, depending on where Office is installed.
| Office 2013 Configuration | File Location |
| 32-bit Office on 32-bit Windows | C:\Program Files\Microsoft Office\custom15.PRF |
| 64-bit Office on 64-bit Windows | C:\Program Files\Microsoft Office\custom15.PRF |
| 32-bit Office on 64-bit Windows | C:\Program Files (x86)\Microsoft Office\custom15.PRF |