****UPDATE – Please note that this process has changed with the release of iOS 9.3 and no longer works as indicated below.
By default, the iPhone sends email using plain-text format, which does not support images (thus no images in signatures). Luckily, the last time we had to set this up we captured screenshots and documented the process.
Below are the steps to add an image to your email signature on an iPhone 6 (iOS9). By doing this you will change the email from a plain-text to an HTML based email that supports images.
1. On your iPhone: Find the image you would like to use in your signature (Tip: An easy way to get your existing signature is to email yourself from your work computer).

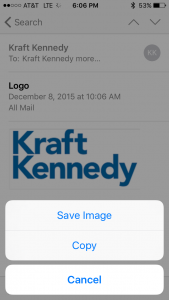
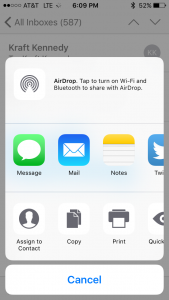
2. Hold your finger down on the image. It is possible that either of these two screenshots will appear. In both cases you need only click ‘Copy.’
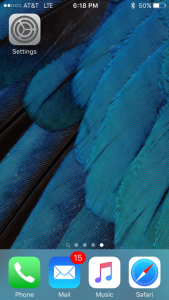
3. Push the home button on your iPhone.

4. Open ‘Settings.’
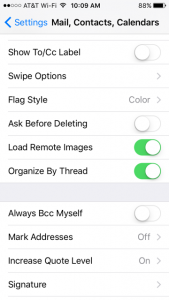
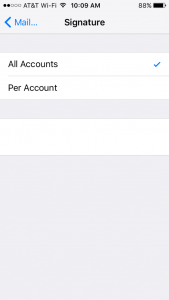
5. Click on ‘Mail, Contacts, Calendars.’

6. Click ‘Signature.’
7. Select which mail account you want to add a signature to, or select ‘All Accounts.’
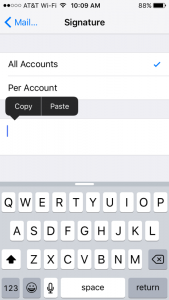
8. Hold your finger down in the blank Signature space, click ‘Paste.’
(Now comes the tricky part)
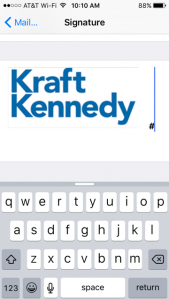
9. Press to the right hand side of the image, and then type a few spaces on the keyboard. This will create white space.

10. Hold down your finger over the white space to select it. Once it is selected, click the ‘B I U‘ button. (# is just there to show where the white space will be.)

11. Now press the ‘Bold’ button.

12. Once the white space has been made ‘Bold’ simply click ”Mail…’ at the top left of the screen.
13. That’s it! When you create a new email (from the Account you selected in step #7) your signature will appear.