We are migrating a client from EMC VNX to a new EMC Unity SAN and part of the process requires us to clean up the legacy datastores. This isn’t a small environment, however, and the datastores span across approximately 30+ hosts. Trying to find which host is actively connecting to this datastore is nearly impossible. The hosts can unmount the datastore, but when “Delete” is selected, you get an error. Some quick things to check are HA and even VDS settings, as these features can sometimes save data onto datastores. In my case, I’d reviewed everything and the datastore had absolutely nothing on it except for the sdd.sf (SCSI device description system file) folder. This usually can’t be deleted and shouldn’t be an issue.
Below, I’ll walk you through the method that I used to delete the datastore. This method should be used as last resort as it involves deleting the partition table. You must verify that you have the correct datastore!
This is the error message that appeared when I tried to delete:
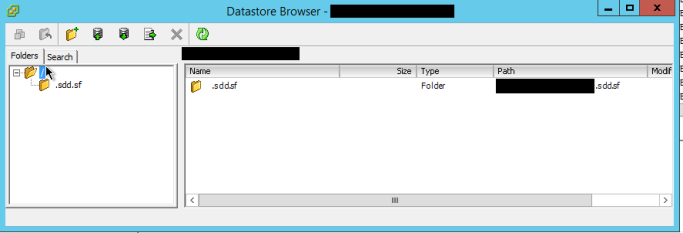
Here is a screenshot of the datastore. As you can see, there’s nothing on it.
Here is how to delete it.
1. Locate the datastore device name. You can do this by right-clicking the datastore and selecting Properties. On the left side there’s a section called ‘Extent’ — Copy that out to notepad.
2. SSH into a host that has the datastore presented.
3. Now that you have your datastore device ID, continue to verify you have the correct datastore by running the following (remember to replace naa. with your own device ID) :
# esxcfg-scsidevs -c | grep naa.60060160019e3000ee5e6dd0aac0e611
naa.60060160019e3000ee5e6dd0aac0e611 Direct-Access /vmfs/devices/disks/naa.60060160019e3000ee5e6dd0aac0e611 6291456MB NMP DGC Fibre Channel Disk (naa.60060160019e3000ee5e6dd0aac0e611)
# esxcfg-scsidevs -m | grep naa.60060160019e3000ee5e6dd0aac0e611
naa.60060160019e3000ee5e6dd0aac0e611:1 /vmfs/devices/disks/naa.60060160019e3000ee5e6dd0aac0e611:1 5850242c-dbbeaa16-422e-0017a4770018 0 DATASTORE_NAME_HERE
# df -h | grep DATASTORE_NAME_HERE
VMFS-5 6.0T 1004.0M 6.0T 0% /vmfs/volumes/DATASTORE_NAME_HERE
4. Everything checks out and the Datastore name matches the device ID. Now gather details about the partition table and delete it. This will solve for ‘Device is in use’ error messages.
5. The command below retrieves all available partitions. As you can see, one partition is formatted VMFS.
# partedUtil getptbl /vmfs/devices/disks/naa.60060160019e3000ee5e6dd0aac0e611
gpt
802048 255 63 12884901888
1 2048 12884901854 AA31E02A400F11DB9590000C2911D1B8 vmfs 0
6. *Please proceed with caution. This last command will destroy all data on the datastore* The last command removes the partition. This allows us to right-click the datastore and delete it without an error.
# partedUtil delete /vmfs/devices/disks/naa.60060160019e3000ee5e6dd0aac0e611 1
#
# partedUtil getptbl /vmfs/devices/disks/naa.60060160019e3000ee5e6dd0aac0e611
gpt
802048 255 63 12884901888
7. After deleting the partition table and completing the removal of the datastore from vCenter, detach the device from each host. This method is preferred when troubleshooting a “datastore is in use” removal. Performing a detach of the device from the host prevents “paths down” and other storage-related events that could cause hosts to become unstable.
8. With an SSH connection to a host, run the following command to retrieve the LUN ID of the device:
# esxcfg-mpath -L | grep naa.60060160019e3000ee5e6dd0aac0e611
vmhba2:C0:T1:L65 state:active naa.60060160019e3000ee5e6dd0aac0e611 vmhba2 0 1 65 NMP active san fc.20000000c9bf8d87:10000000c9bf8d87 fc.50060160c720092a:500601694720092a
vmhba1:C0:T0:L65 state:active naa.60060160019e3000ee5e6dd0aac0e611 vmhba1 0 0 65 NMP active san fc.20000000c9bf8d86:10000000c9bf8d86 fc.50060160c720092a:500601634720092a
vmhba2:C0:T2:L65 state:active naa.60060160019e3000ee5e6dd0aac0e611 vmhba2 0 2 65 NMP active san fc.20000000c9bf8d87:10000000c9bf8d87 fc.50060160c720092a:500601624720092a
vmhba1:C0:T1:L65 state:active naa.60060160019e3000ee5e6dd0aac0e611 vmhba1 0 1 65 NMP active san fc.20000000c9bf8d86:10000000c9bf8d86 fc.50060160c720092a:500601684720092a
vmhba2:C0:T3:L65 state:active naa.60060160019e3000ee5e6dd0aac0e611 vmhba2 0 3 65 NMP active san fc.20000000c9bf8d87:10000000c9bf8d87 fc.50060160c720092a:500601604720092a
vmhba1:C0:T2:L65 state:active naa.60060160019e3000ee5e6dd0aac0e611 vmhba1 0 2 65 NMP active san fc.20000000c9bf8d86:10000000c9bf8d86 fc.50060160c720092a:5006016a4720092a
vmhba1:C0:T3:L65 state:active naa.60060160019e3000ee5e6dd0aac0e611 vmhba1 0 3 65 NMP active san fc.20000000c9bf8d86:10000000c9bf8d86 fc.50060160c720092a:500601614720092a
vmhba2:C0:T0:L65 state:active naa.60060160019e3000ee5e6dd0aac0e611 vmhba2 0 0 65 NMP active san fc.20000000c9bf8d87:10000000c9bf8d87 fc.50060160c720092a:5006016b4720092a
9. The command above retrieves all of the multi-path information for the LUN. It also retrieves the LUN ID, which in my case happens to be 65.
10. Perform a detach of LUN 65 using the vSphere Client.
11. Perform this on every host and then you can safely remove it on your SAN.


