As mentioned in my previous blog post about the Exchange 2010 RPC Client Access Service and the ClientAccessArray, Exchange’s dependence on the Client Access Server (CAS) role has increased dramatically in Exchange 2010. This is because, in Exchange 2010, on-network Outlook MAPI connectivity now connects to a mailbox through the CAS role via the RPC Client Access Service. As a result, high availability of the CAS role is crucial since any failure of CAS could affect Outlook client connectivity. For smaller implementations or those where the limitations of native Windows Network Load Balancing (NLB) are not a major problem (please see my previous blog post for more information), NLB can work well. The process for configuring NLB is fairly straightforward and I’ve outlined the steps below.
Preparing for NLB
Once two or more Exchange 2010 servers (each with two NICs) with the CAS role installed have been deployed, you are ready to start configuring NLB to provide high availability and load balancing. First, you must allocate a dedicated private IP address and create an associated A record in DNS for the NLB cluster. This IP address and name are what clients will connect to and against which the ClientAccessArray will be created. In this blog post, I will use 10.1.240.100 and EXCHCASArray.client.local. Please note that the IP address should be on the same subnet as the two CAS servers that will become members of the NLB cluster.
NLB can be configured either in unicast or multicast mode. The former changes the MAC address of each NLB cluster member’s NIC to a virtual cluster MAC address, to which clients connect. The latter allows the NICs to maintain their existing MAC addresses and adds a virtual cluster MAC address. Unicast is the preferred method for NLB, so I will explain the process for this method in my details below.
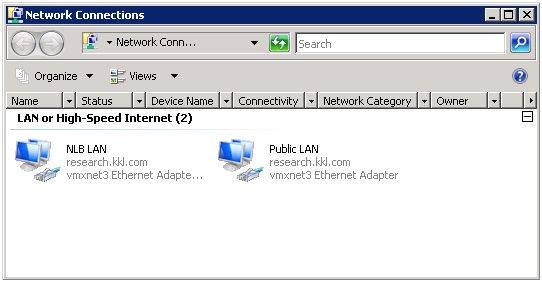
To simplify the management of your NLB cluster members, I recommend that you name each NIC’s network connection so that it is easy to understand what function the NIC serves. For example, as depicted below, I have named the connections “Public LAN” (used for communication with clients and servers on the network) and “NLB LAN” (used for internal NLB heartbeat). This process should be repeated on all NLB cluster members.
The Public LAN NIC on each server should be configured normally, with an IP address, subnet mask, default gateway, DNS servers, etc. For this example, I will use EXCHCAS01 (10.1.240.101) and EXCHCAS02 (10.1.240.103) as my two CAS servers. The NLB LAN NIC on each server should be configured with an IP address and subnet mask only. For this example, I will use 10.1.240.102 for EXCHCAS01 and 10.1.240.104 for EXCHCAS02.
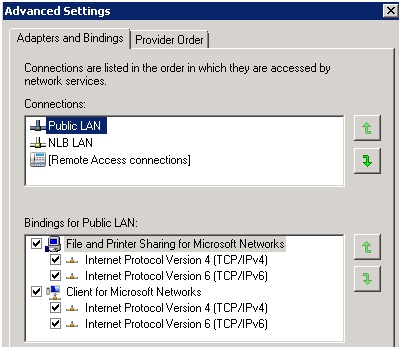
Once the NICs have been configured, we must ensure that the binding order is configured to bind the Public LAN NIC first. Within the Network Connections window, click Advanced, Advanced Settings and modify this if necessary. Be sure to press the ALT key first to bring up the File menu in Windows 2008.
Configuring NLB – First Member
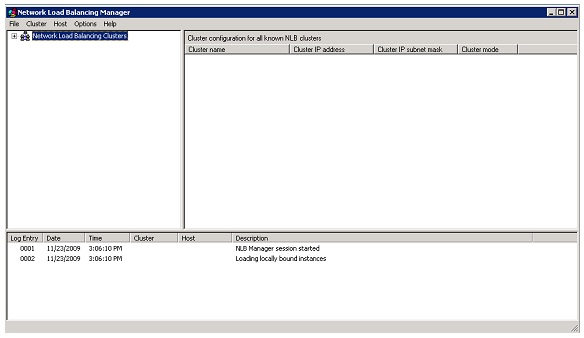
On each NLB cluster member, NLB must be installed. With Windows 2008, this can be completed simply by running the command “ServerManagerCmd -i NLB” via a command prompt. Once NLB has been installed, launch the Network Load Balancing Manager to continue the configuration process.
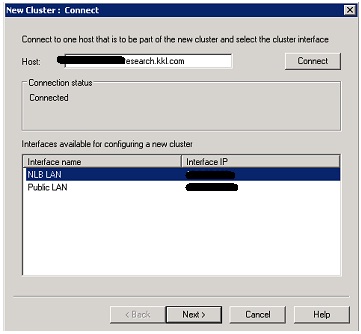
To create your new cluster, you can right-click Network Load Balancing Clusters or simply click Cluster, New. In the New Cluster wizard, enter the name of the first server in the NLB cluster (for example, EXCHCAS01) and click Connect. This will display the available NICs on the server, at which point the NLB LAN NIC should be chosen before clicking Next.
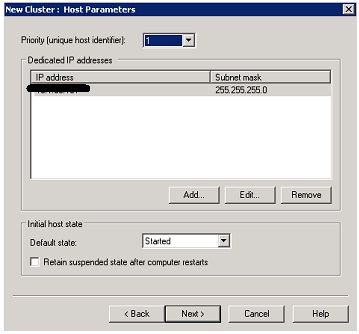
Since this is the first member of the NLB cluster, you can leave the all of the Host Parameters at their default values, as depicted below. Please note that the Priority value should be configured as 1 for the first member.
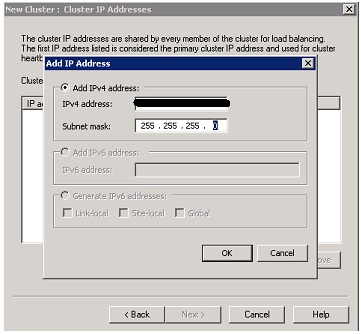
Next we must configure the IP address and subnet mask of the NLB cluster, which is the IP address for which we created a DNS A record at the very beginning of this process. In this example, this would be 10.1.240.100 and 255.255.255.0, respectively.
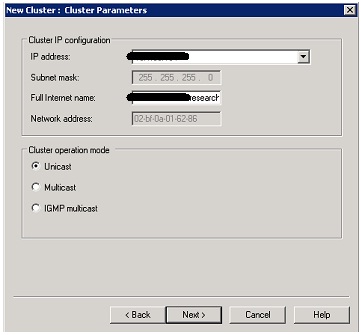
For the Cluster Parameters, we want to enter the FQDN of the DNS A record we created at the very beginning of this process (EXCHCASArray.client.local). In addition, Unicast should be selected as the desired clustered operation mode.
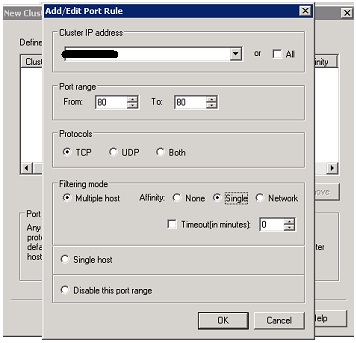
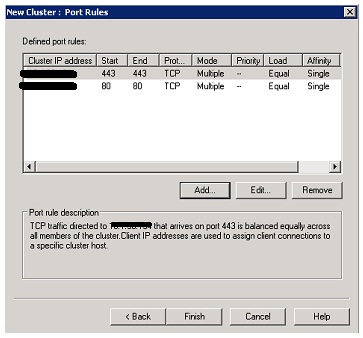
The next screen allows you to configure port rules so that you can restrict what traffic is allowed across the NLB cluster IP address. For Exchange 2010 CAS, I recommend that the default port rule of 0 – 65535 be replaced with port rules to allow only 80 (HTTP) and 443 (HTTPS). This is especially important if servers hosting the CAS role also host other functions, such as the Hub Transport Server role. If you require IMAP or POP3 connectivity to CAS in your environment, you will also want to add port rules for 143 and 110, respectively. I’ve depicted the configuration of a port rule for port 80 below.
Update: Please note that, for internally facing CAS servers front-ending MAPI traffic, you will also need to create port rules for TCP port 135 (RPC Endpoint Mapper) and TCP ports 1024-65535 (the dynamic port range for Outlook RPC access).
Once all of the desired port rules have been configured, you may click Finish to complete the configuration of the first NLB cluster member.
Let the NLB cluster converge with its first member and you should eventually see the cluster report success.
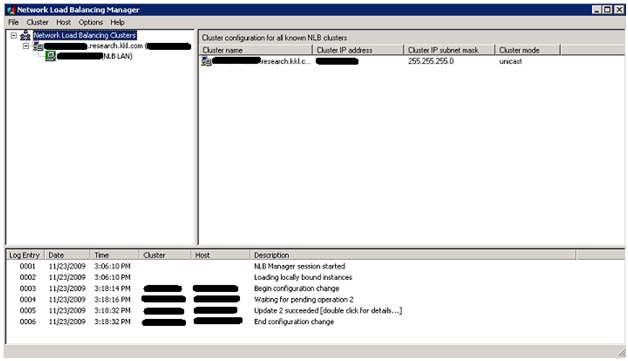
Now you can proceed with adding your second cluster member.
Configuring NLB – Second/Subsequent Member
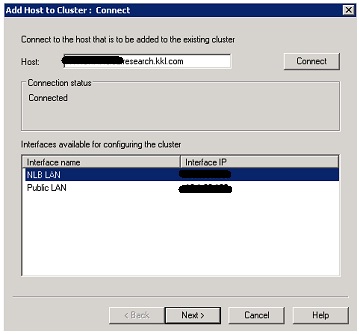
After the configuration of the NLB cluster itself and the first NLB cluster member has been completed, you are ready to add additional members. Provided that NLB has been installed, you can simply right-click on your NLB cluster in the Network Load Balancing Manager and click Add Host To Cluster.
Enter the name of the second NLB cluster member, for example EXCHCAS02, and click Connect. Be sure to choose the NLB LAN NIC and click Next.
On the Host Parameters screen, ensure that the Priority is set to 2 (or as appropriate, depending on how many cluster members you have) and click Next.
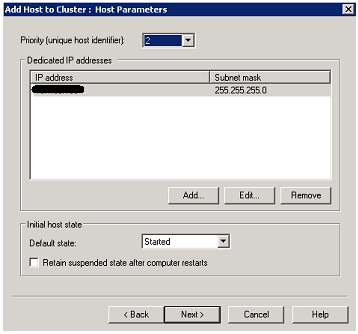
Confirm that your port rules are accurate and, if they are, click Finish to add your second NLB cluster member.
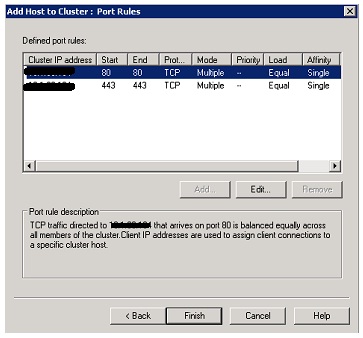
Let the NLB cluster converge with the new member and, eventually, it should report success.

At this point, you have an NLB cluster with two members!
Next Steps
Before you start using your new NLB cluster for CAS functionality, you should complete two final tasks. First, IP forwarding should be enabled on each cluster member’s NLB LAN NIC. By default, Windows 2008 disables IP forwarding, which causes problems with NLB. IP forwarding enabled allows, from an NLB perspective, requests sent from one NIC to be sent out the other. IP forwarding can be enabled on your NLB LAN NIC by running netsh interface ipv4 set int “NLB LAN” forwarding=enabled from a command prompt.
Finally, you will want to configure a ClientAccessArray within Exchange 2010 to represent your new NLB cluster so that Outlook clients will not simply resolve your NLB cluster name to a participating member and store that member’s name in the MAPI profile. Please refer to the instructions in my previous blog post for how to configure a ClientAccessArray.